
Advanced Burp Suite
I recently had some one come to me and ask for advice on how to get into the cyber security field, specifically web application security. I recommended a couple good books and certifications to look at, as well as some good resources for video training materials, but I only recommended learning one tool – Burp Suite. You know why? Because I f*cking love this tool.
If you’re new to Burp Suite, I would take a moment to skim through our previous post, Burp Suite For Beginners to get a feel for the basic setup and overview of tools within the suite. We’ll be walking through some of the more advanced uses and configurations for Burp Suite today:
- Testing mobile applications
- Testing thick clients
- Creating your own Burp Suite extension
- Handling sessions for automated tools
So load up that jar file, configure those proxy settings, and buckle up because we’re in for a ride.
Testing Mobile Applications
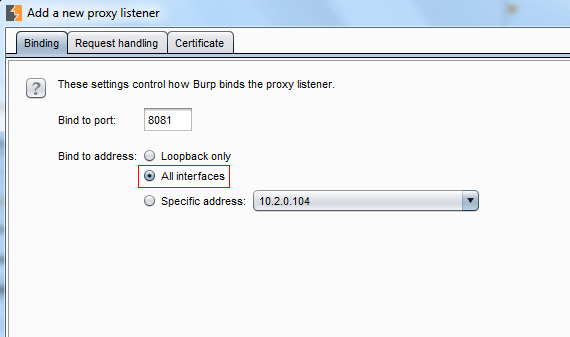
Setting up Burp Suite to intercept mobile app traffic is actually surprisingly easy. Once setup is complete, you’ll be able to run the application on your phone while intercepting all requests and responses on your computer. The first step is to add a new proxy listener in the proxy options, but this time we’ll be setting the bind to address to All Interfaces:
Next, we’ll go to our phone’s network configuration and manually set an HTTP proxy. It will ask you for a server and port. The server IP is just your computers local IP address and the port number is the one your chose for the proxy listener:

Now that your phone’s HTTP traffic is being routed through Burp Suite, we need to install Burp Suite’s certificate on your phone. In your phone’s browser, navigate to http://burp and select “CA Certificate”:

It will prompt you to install, then ask for your phone’s password:

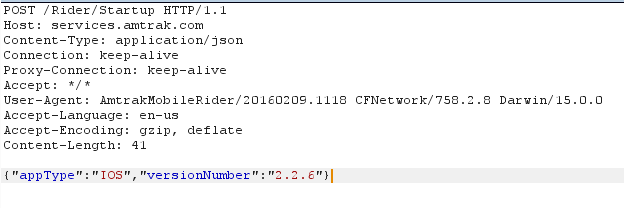
After that, you’re all set to start testing mobile applications! You can use Burp Suite just as you would for a web application. Most mobile apps use a REST API, for example:
Testing Thick Clients
No one is safe from Burp Suite. With the invisible proxy, you can actually route the traffic from a thick client or non-proxy aware application through Burp Suite. Personally, I’d rather use Echo Mirage or Mallory (even though she can be a real b*tch sometimes), but it’s up to your preference.
The first thing we need to do is modify our host file to so that we can redirect the domain name we are testing to our local machine:

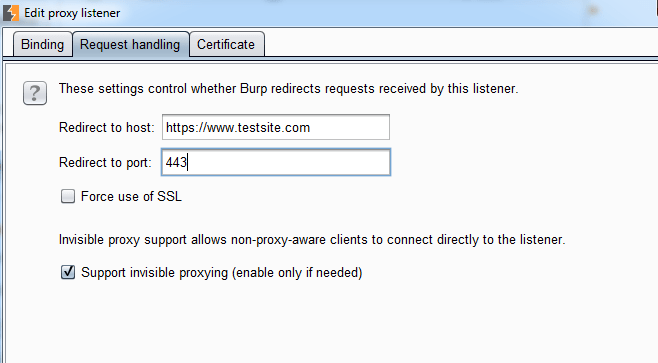
Now that the thick client is sending all requests to our listeners, we can set up Burp Suite’s configurations. Set up a proxy listener as you usually would, but make a couple changes under the Request Handling tab. We need to set the redirect host due to the fact that we’ve changed our host file. We also want to check the box for “Support invisible proxying”:
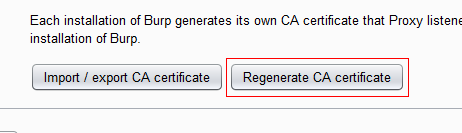
After you’ve done that, you will want to click on “Regenerate Certificate”, just to be sure that you avoid an SSL issues:
And now you should be good to go! Again, Echo Mirage is a far better solution for intercepting thick client traffic. We’ll definitely be covering a tutorial on the tool later on, but I would recommend downloading it and giving it a try.
Creating Your Own Extensions
Well if having one of the best web application security tools at your finger tips (for free) wasn’t enough, you’ll be glad to know that you can create your own Burp Suite extensions. Welcome to god mode.
Of course, this requires some coding experience. Extensions can be written in Java or Python and are added directly to your instance of Burp Suite. You can also download other popular extensions from the BApp store if they have what you’re looking for.
The first step to creating your own extension is to save Burp Suite’s interface files to your project folder. Create a new folder called “burp” within your project folder, then go to Burp Suite and under the Extender -> API tab, click on “Save Interface Files”:

I would also recommend saving the Javadoc files so that you can reference them as you build your extension.
Next, create a class called BurpExtender that implements the IBurpExtender interface:
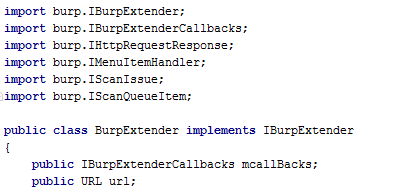
Any burp extension must utilize one of the five methods described in IBurpExtender interface. For example, I’m utilizing registerExtenderCallbacks and processHTTPMessage:


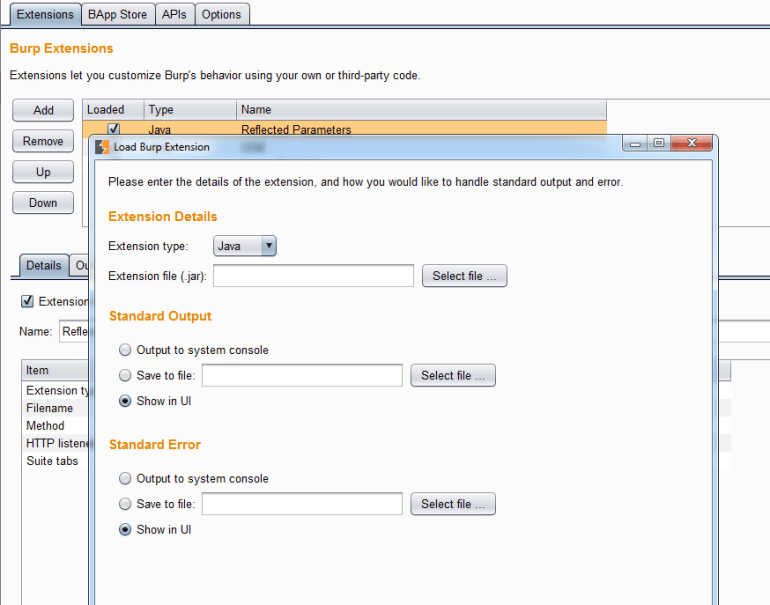
Once you’ve gone through the awful, endless cycle of coding and debugging… You can navigate to the Extender -> Extensions tab and select “Add”. This will prompt you for your jar file, as well as some other details:
Not bad at a high level, right? I’ll have to dedicate a whole post to the actual technical side of creating extensions, but the Javadocs are very descriptive and you’ll be able to get started with those.
Handling Session Tokens
As you may have noticed by now, Burp Suite will only track an application’s session through its cookie jar. But what happens when your session suddenly becomes invalidated as you’re doing an active scan? Yeah… nothing good. So that’s why Burp Suite has session handling rules that can be configured for your testing.
First, let’s go to the Options -> Sessions tab. Right at the top, you’ll see “Session Handling Rules”. If this is your first time playing around with this feature, you should only see the rule to use Burp’s cookie jar. So let’s add our own rule by clicking “Add”:

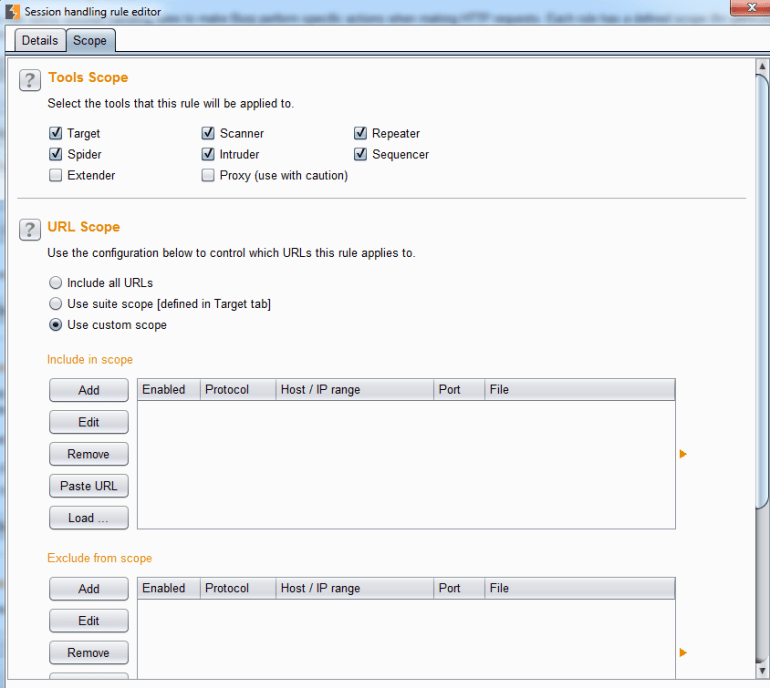
From here we can give our newly born rule a name and set its actions. Under the scope tab, we’ll define which domains this rule should be applied to, as well as which parts of Burp Suite should implement this rule:
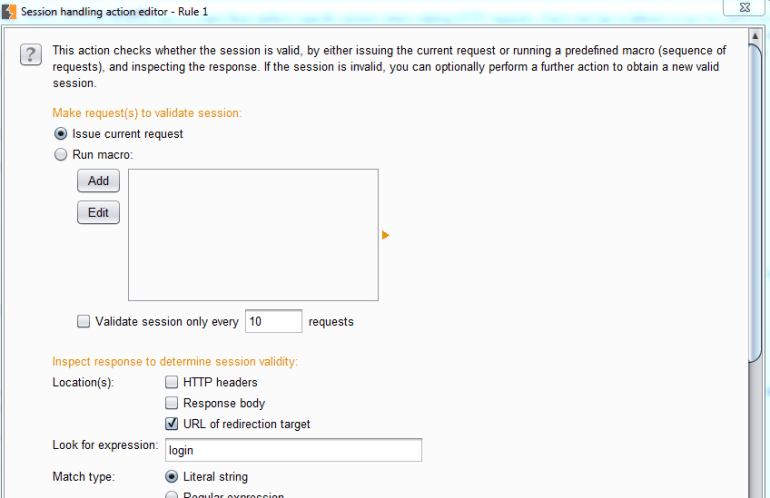
Let’s go back to the Details tab and click on “Add” under Rule Actions. We’re going to select “Check Session Is Valid” for the drop down list and we should see the following pop up screen:
So let’s go through this one step at a time…
Make Request(s) To Validate Session

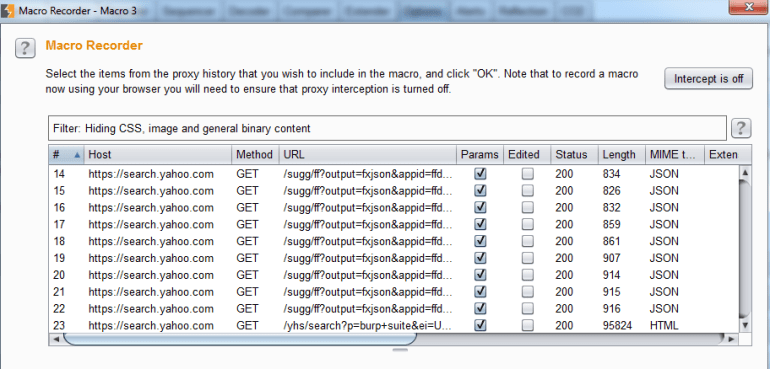
In this section, we’ll define what needs to be done to check if a session is still valid. By default, it will issue the current request. You can also set up a macro if multiple requests need to be issued. Selecting “Add” will pop up a screen where you can select multiple requests from your proxy history to use as the macro.
Once you’ve selected your requests, you can now make sure everything is configured correctly. Along the right side, you can move requests up or down in the order of which they are sent or you can configure the request parameters and cookies. At the bottom, you can test your macro to ensure that it works properly:

At the bottom, you’ll see a check box that will tell Burp Suite to only check session validity every X requests. By default, it should check for a valid session before each test.
Inspect Response To Determine Session Validity

Here, we’ll tell Burp Suite how to determine whether or not a session is valid. It’s common for an application to redirect to a login page if the session has expired, so we can check “URL of redirection target” and tell it to look for “login”. We can also check the response body for a regular expression, giving us much more flexibility.
Define Behavior Dependent on Session Validity

Finally, we’ll tell Burp Suite what to do if the session is invalid. We have two options here:
- Run a macro
- Prompt for in-browser session recovery
Adding a macro will bring you through the same steps that we saw previously.
Once you’ve chosen your option, we now need to tell Burp Suite what to update with this new session:

If you have a CSRF token, you’ll need to make sure the parameter values are updated. You’ll also need to make sure any cookies that determine session are updated as well. You can specify which parameters/cookies are updated/not updated in the fields below the check boxes.
Once that’s complete, you’re good to go! If you have any problems maintaining session, you can use Burp’s Session Tracer, found right below your list of session rules.
That’s all I have for today. Thanks for reading and hope this helped!
