
Setting up your first Virtual Environment
The cornerstone of every effective ethical hacker is the establishment of their virtual lab environment in order to conduct all kinds of operations from penetration testing known vulnerable servers to analyzing malware in a controlled environment. By our very nature as white hat hackers we do not attack systems owned by others without their expressed written consent … with occasional exceptions like the “Wall of Sheep” from Def-Con:

Using virtual environments exists as one of our most effective means of being able to practice our skills that the bad guys are using but in a legal and ethical manner.
Today I’ll be walking through some of the relevant options and tips and tricks that should help you get started in setting up your own environments fit for your needs! This tutorial will assume you have Oracle’s VirtualBox installed and running, we will be using this amazing (and free!) virtualization software for the foundation of our environment. This tutorial seeks to accomplish the following:
- Setting up our first attacker machine with Kali Linux
- Spinning up our first victim machine with Metasploitable
- Get them into a position where they can talk to one another
Setting up our attack machine
(Kali Linux)
Creating and installing the machine
Here we’re going to walk through step by step setting up your first attacker machine by running the Kali Linux 2.0 operating system. Kali is a Linux distribution focused on tools for different types of penetration testing, reverse engineering, digital forensics, etc. This will ensure that you have a lot of what you need pre-installed and (mostly) pre-configured. Be warned though, it is very easy to gloss over understanding the purpose and usage of each tool when it comes all wrapped up in a nice package. Make sure not to use this convenience as a crutch, learn the fundamental concepts behind what the tool accomplishes so you don’t turn into another dreaded script kiddie.
First we’ll navigate to kali.org to get a Kali image (.iso) to start our download:

**Note: there are premade virtual appliances for VirtualBox but by installing it manually from the image we’ll build some experience installing an operating system and more control over the specs of the VM**
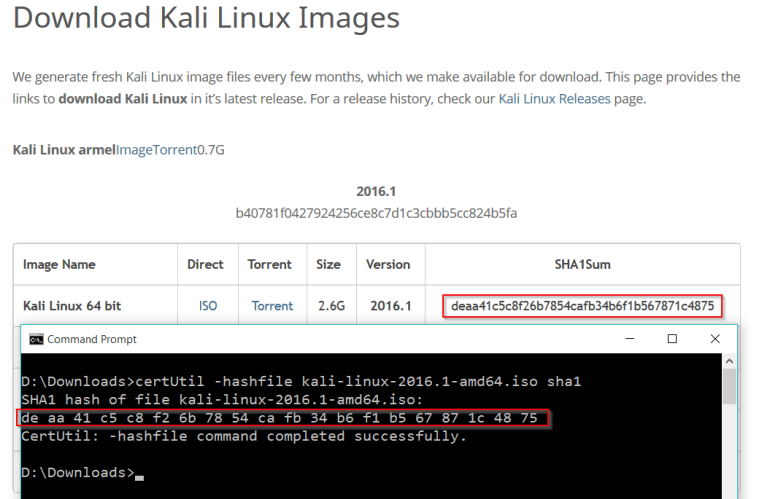
After the download finishes it’s usually good practice to utilize the checksum if one is offered. Checksums serve as an effective means for us to check the integrity of our download to ensure the image didn’t suffer from any corruption or alteration during the download. Hashes are basically math functions that take variable length input and output fixed-length strings. They are designed to radically change the output if the slightest change occurs in the input allowing us to verify we downloaded the image intact. While MD5 and SHA1 aren’t the best hashing algorithms on the market for something like password hashing (please don’t use MD5), they still manage to serve the community for generating integrity checksums.
For Windows host machines you can use the certUtil command shown in the screenshot above. For Linux host machines you can use md5sum or sha1sum commands depending on the hashing algorithm used.
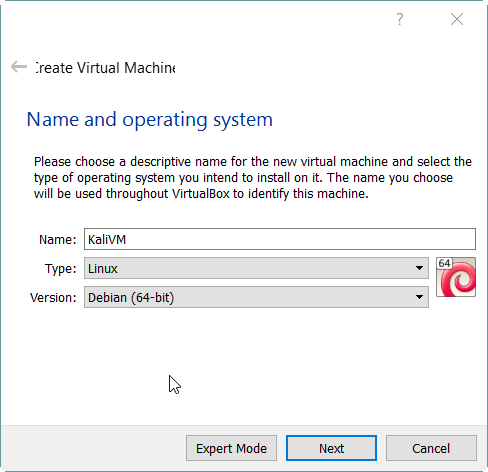
We’ll start off by pressing the new button in the VirtualBox Manager and entering a name for our VM. Set the type to “Linux”, the Version to “Debian”, and depending on if you downloaded a 32-bit or 64-bit version of Kali choose appropriately. The Kali Linux 2.0 operating system is based on Debian’s “Jessie” release, so I’ll be selecting Debian (64-bit) for the purposes of this guide.

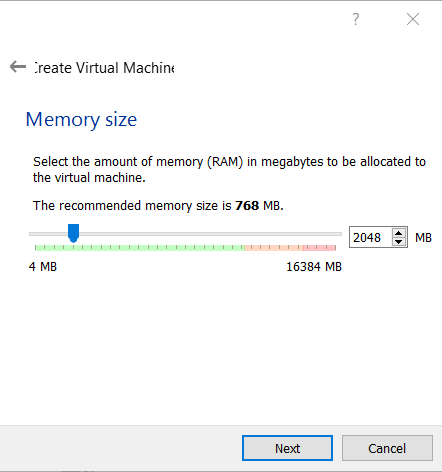
Memory size
Generally you’ll want to at least give it 1GB (1024 MB) of RAM so it’s more usable but if you can afford to give it more (while leaving enough for your host machine) it’ll only help the VM. In my example I’ll be giving it 2GB (2048 MB).
Hard Disk
Leave the option on “Create a virtual hard disk now” and press Create.
Hard disk file type
Leave the option on “VDI (VirtualBox Disk Image)”, and press Next.
Storage on physical hard disk
If you are concerned with disk space leave option on “Dynamically allocated” which is the option I normally use unless there is a specific need for Fixed size. Dynamic will save you space in the long run once you realize you have 20 VM’s stored up in VirtualBox.
File location and size
I would recommend 60 – 80 GB if you can afford it, once you start doing some work, upgrading, adding tools, it’ll surprise you how fast can fill up. With Dynamic allocation you won’t feel the negative effects of giving it a higher upper limit if down the road you don’t use the VM much.

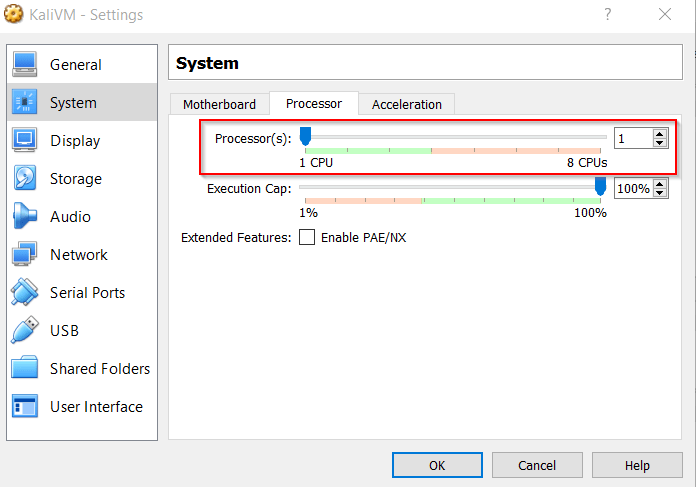
Settings – System – Processors
Depending on how many cores your processor has you may even find yourself wanting to up the number of CPU’s the VM uses, obviously as with memory make sure you leave enough power to your host machine or your VM will start suffering. This option can be found by clicking on the VM → Settings → System.
Starting up the VM
When you start to run the Virtual machine it will notify you that it needs a virtual disk or physical drive to boot from, this is where you’ll locate your Kali Linux disk image and press Start.

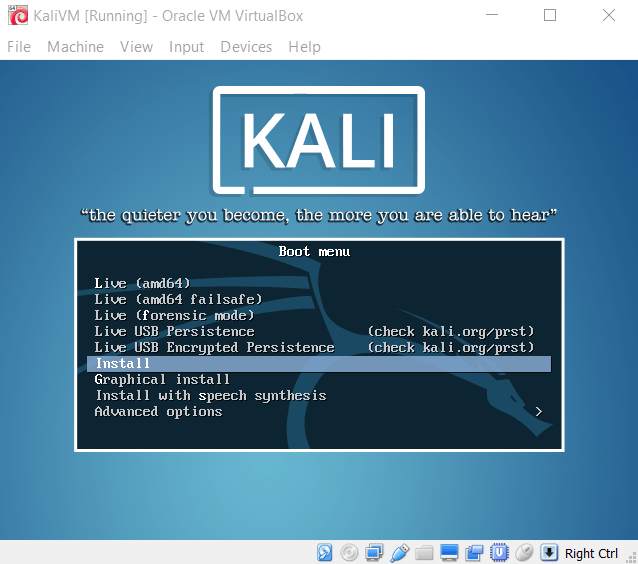
Install
Select either Install or Graphical install, for the purposes of this tutorial I’ll be going through “Install”. The variations of “Live” just means that you dont want to install the operating system, you just want to boot the system off of the image.
The next few are pretty self-explanatory….
Choose appropriate language
Select your location
Select keymap
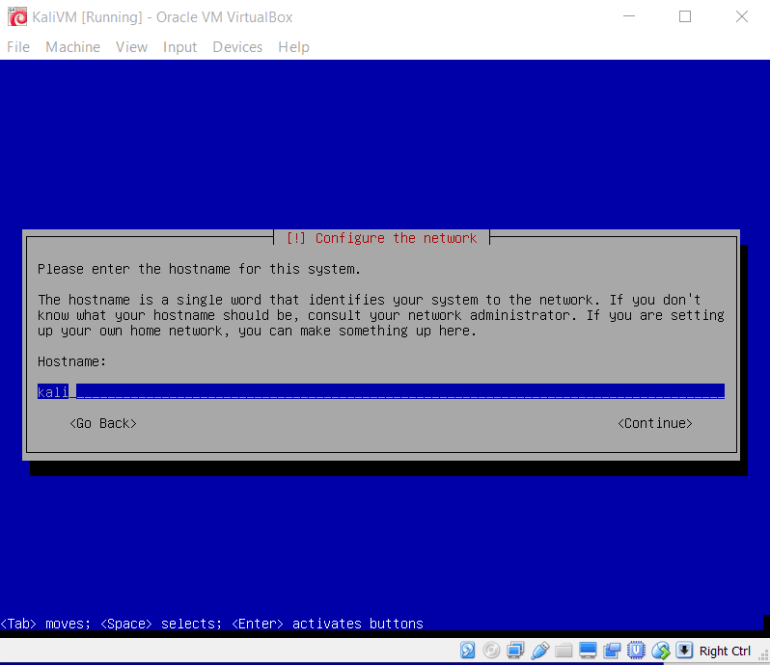
Select your hostname
This is the name that will appear after your logged in username in a terminal (e.g. root@kali). For now you can put it as whatever you want or leave it as kali.
Domain name
Unless you already have a big plan for a virtual network with proper domain names I wouldn’t worry about this just yet, you can change it later or spin up a new VM if you ever change your mind. I’ll be leaving it blank for this tutorial.
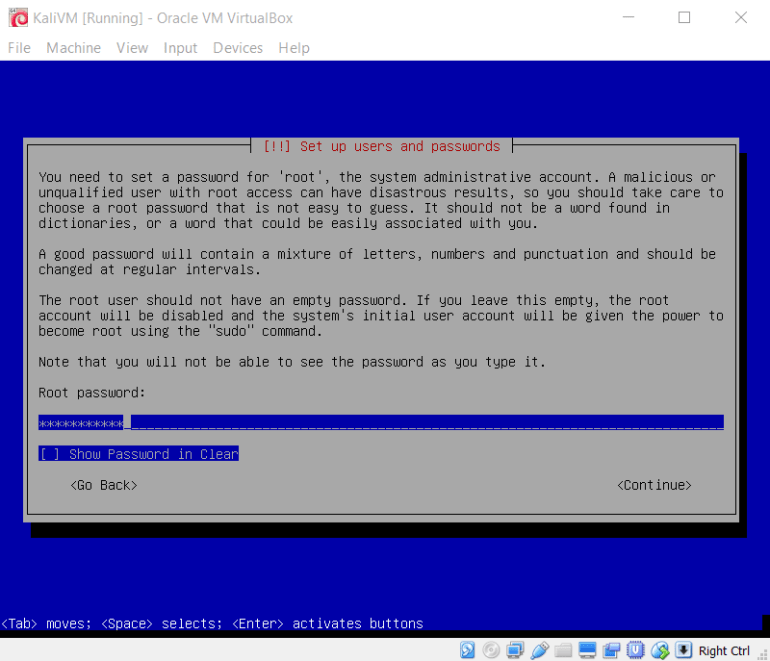
Set your root password
These are the “keys to your kingdom” to the almighty root account of legend, so I’d recommend a password that would be accepted by a proper password policy (at least 8-10 characters, numbers, letters, capital letters, special characters, etc.). If you expose this VM to the internet and something manages to get on your box and get the root password it could cause a bit of issues down the road…
Configure your Timezone
Self-explanatory…
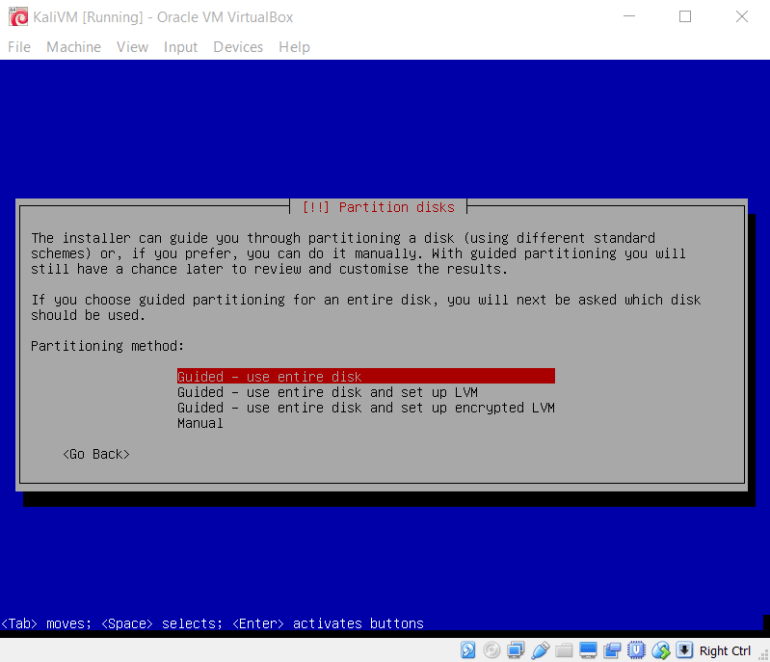
Partitioning the disk
For the guide I’ll be simply going with “Guided – use entire disk” since we’re on a virtual machine the entire disk will be what we allocated for the VM itself so don’t worry about overwriting your Host OS. I would recommend doing some research on LVM and encrypting your drive if you’re interested.
 Select the disk to partition
You should only have one option (ATA VBOX HARDDISK), so select it to continue
Partitioning scheme
“All files in one partition (recommended for new users)” is the go-to option unless you have specific reasons for the other options.
Overview of partitioning
“Finish partitioning and write changes to disk” unless you made a mistake, undo the changes to change previous options. Then select Yes to write changes to disk.
 Use a network mirror
If you currently have a network connection select “Yes” so you can conveniently have access to the latest versions of software available.
HTTP Proxy
If you’re on a home network you shouldn’t need to set anything for this, press “Continue”. If this option gives you problems I would recommend checking your proxy options for your browsers and mimicking it, or harass your nearest tech geek.
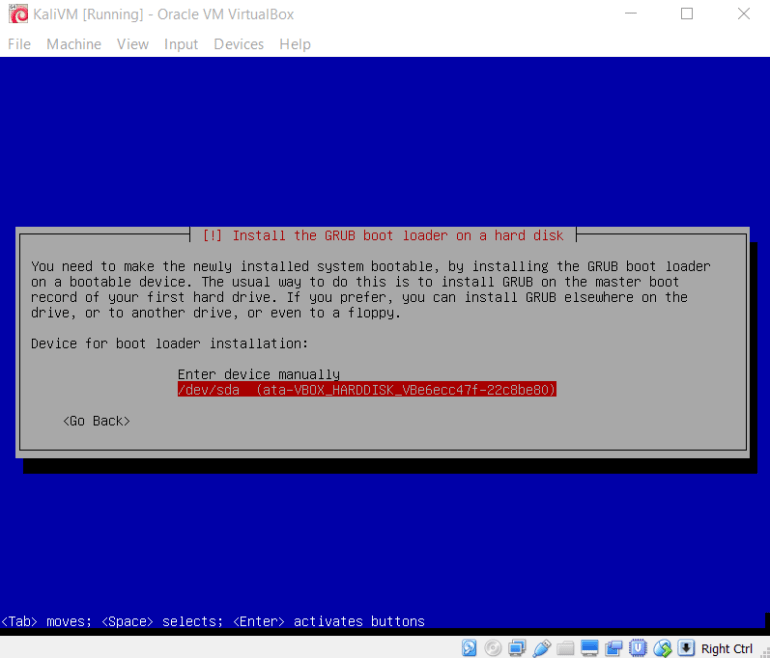
Install the GRUB boot loader
Again, unless you have a reason for doing otherwise select “Yes”.
Device for boot loader installation:Select the /dev/sda VBOX HARDDISK device for the boot loader installation.
 Installation complete
Press continue
Congratulations you have your first virtual machine installed and ready to boot!
Updating and Installing Guest Additions
So you may have noticed that when starting the VM it probably won’t maximize to the resolution of your screen, which makes working in the VM kind of annoying… Luckily VirtualBox has the the Guest Additions CD that can solve this issue for us.
Take a snapshot… just in case
Virtualbox has this feature that lets you take a literal snapshot of the current state of the machine that you can revert back to later if something happens. Rather than going through that lengthy install process again let’s save a snapshot right now and name it something like “Initial Install”. Navigate to Machine → Take Snapshot.

Update and upgrade
Now we’re going to update and upgrade the packages we currently have installed on the system. Run the following command: apt-get update && apt-get upgrade

Guest Additions
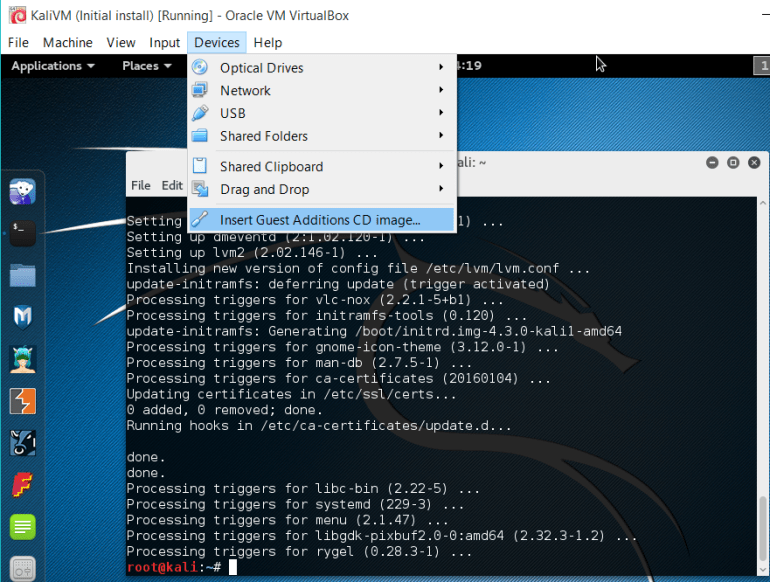
Now that we’re all updated, Navigate to Devices → “Insert Guest Additions CD image…”.
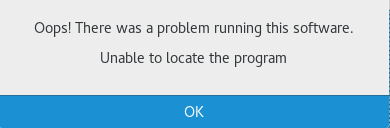
You may receive an error when running the disk as shown below, continue to the next step.

Open up a terminal and navigate to /media/cdrom, and run the command “bash VBoxLinuxAdditons.run”
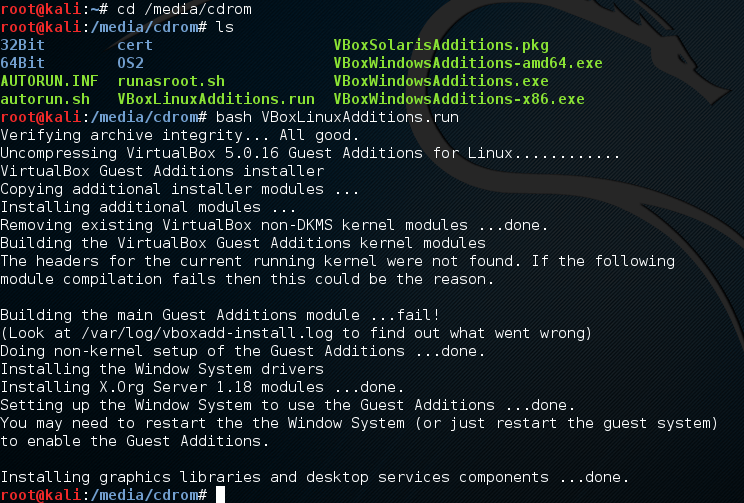
Now you should be able to restart the machine and the virtual machine will fit to your screens resolution. If it still doesn’t work there is information out there on google, my recommendation is to check the /var/log/vboxadd-install.log and if it mentions something about kernel headers look up threads on google about solutions. I ran into this issue when Kali 2.0 was first released but it ran fine on the install for this tutorial.
Your attacker machine should now be fully functioning, it would be a good idea to save another snapshot at this point so you can revert back to a fresh copy if something breaks down the road.
Now we find ourselves in a conundrum, what good is an attacking machine without a victim?
Setting up the victim machine
(Metasploitable)
Navigate to:
https://www.offensive-security.com/metasploit-unleashed/requirements/
Scroll down to the Metasploitable download link from source forge.

Download and unzip the file and go to our VirtualBox Manager and let’s create a new VM with a slightly different process. Since the Metasploitable zip gives us a .vmdk we’ll just be booting off that virtual disk. Set the VM options to those shown below choosing whatever name you like.
 For the Hard disk options select “Use an existing virtual hard disk file” and navigate to the Metasploitable.vmdk file; press Create.
 Finally we have no need to expose such a vulnerable server to the internet and want to have our Kali machine on the same network to interact with it. So…
- Power down your Kali machine
- Go to Settings → Network and change the adapter to a Host-only Adapter for both machines

Just to give a quick reference to the common adapter types I’ve used:
NAT: This will use your host as a router and allow you to connect to the internet but the host will remain “invisible” to other guests and hosts. This is probably the safest way to have a VM connected to the internet.
Host-Only & Internal: These will put your guests on their own internal network (either with or without the Host involved), they will not have internet access but you can ensure the network is in a closed controllable environment.
Bridged Adapter: This basically causes your machine to be another host on your Local Area Network, as if it connected to the router itself over wifi or cable. This is useful in situations you want your VM to interact with your local network, but this puts the machine at risk of being a target of an attacker if they manage to get on your LAN. I would only use this adapter when you have a need for it.
Keep in mind these are my casual explanations for what these do, if you have some networking knowledge and you’re interested for information of whats really going on under the hood check out https://www.virtualbox.org/manual/ch06.html.
Testing the waters…
Start up both machines, log into your Kali machine with root as the user and the root password you set during the installation. Login to the Metasploitable machine with msfadmin/msfadmin. In the victim machine run “ifconfig” to get the IPv4 network address.
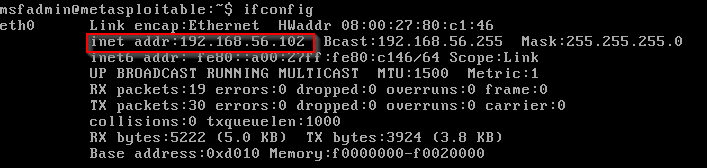 The IP address of my victim machine is 192.168.56.102, so first up let me ensure that my attacker machine can communicate with it by sending a ping.
 Now that I can confirm packets can be sent to and from my attacking machine to my victim lets try a port scan using the popular nmap.

Quick explanation of the above nmap command in case you’re unfamiliar:
Nmap -sV -O -T4 192.168.56.102
-sV: Enables version detection which will grant additional details about the services running behind open ports nmap detects
-O: Enables OS fingerprinting
-T4: Allows the scan to run faster (default is T3), since we’re in a virtual network we don’t have to worry too much about overdoing the speed
This should give you a starting point but I can’t recommend more for you to look at the nmap man page (type “man nmap” or check out their website at nmap.org) so you really get an appreciation for everything this tool can do.
Once you gain a decent foothold in breaking machines I recommend vulnhub.com if you seek further vulnerable VM’s with a little more challenge to them, you will learn a lot of techniques by breaking into elaborate machines set up by other people.
Now that you have your virtual machine environment set up, go do some recon and start breaking things (ethically)!
