

Burp Suite For Beginners
Buckle up, this is going to be quite the ride. Burp Suite is a web application penetration tester’s bread and butter, a powerful suite of tools that covers everything you could ever want, need, or dream. I’ll do my absolute best to cover everything in depth, but there’s quite a bit. Here’s a quick list of Burp Suite’s components:
- Intercepting Proxy – lets you inspect and modify traffic between your browser and the target application.
- Spider – crawling content and functionality.
- Web Application Scanner* – automated detection of numerous types of vulnerability.
- Intruder – performs powerful customized attacks to find and exploit unusual vulnerabilities.
- Repeater – manipulate and re-send individual requests.
- Sequencer – test the randomness of tokens.
- The ability to save your work and resume working later.
- Extensions* – allows you to easily write your own plugins or download pre-made plugins, to perform complex and highly customized tasks within Burp
* Denotes features that require a Burp Suite Pro license.
Intercepting Proxy
The intercepting proxy is the foundation of any web application penetration tester’s tools. Burp Suite’s proxy is easy to use and syncs well if the rest of the tools within the suite. The first step to using the intercepting proxy is to set up the proxy listener (found under Proxy –> Options). I have mine set to the default localhost (127.0.0.1) and port 8080:
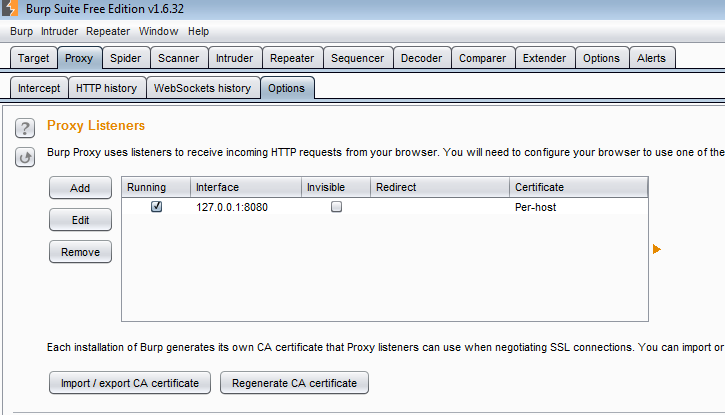
You can always edit this by clicking on the listener then selecting “Edit” or you can add a new one. Once you have that set up, just go into your browser’s network connection settings and manually configure the proxy settings:
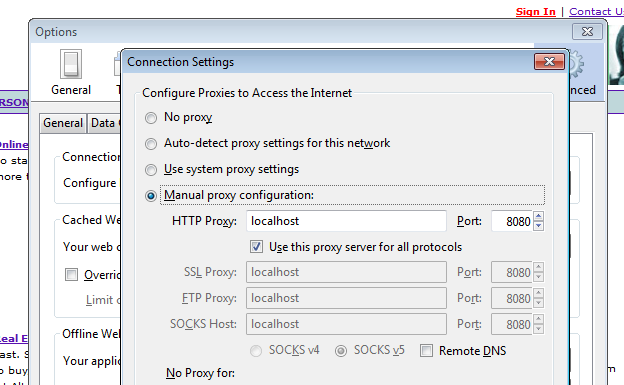
Now we can go to our test application and view all requests that are sent. Go to the Proxy –> Intercept tab and make sure “Intercept is on” and now all requests will be trapped:
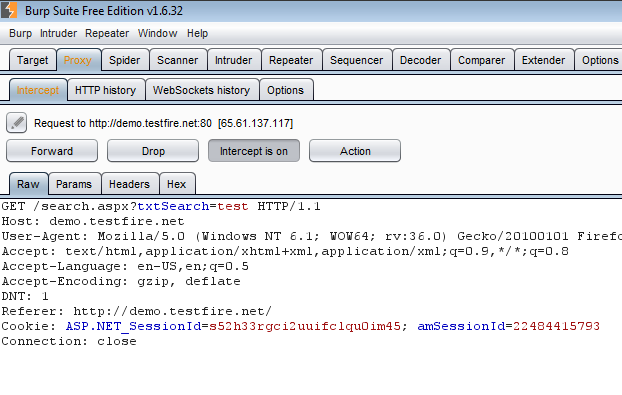
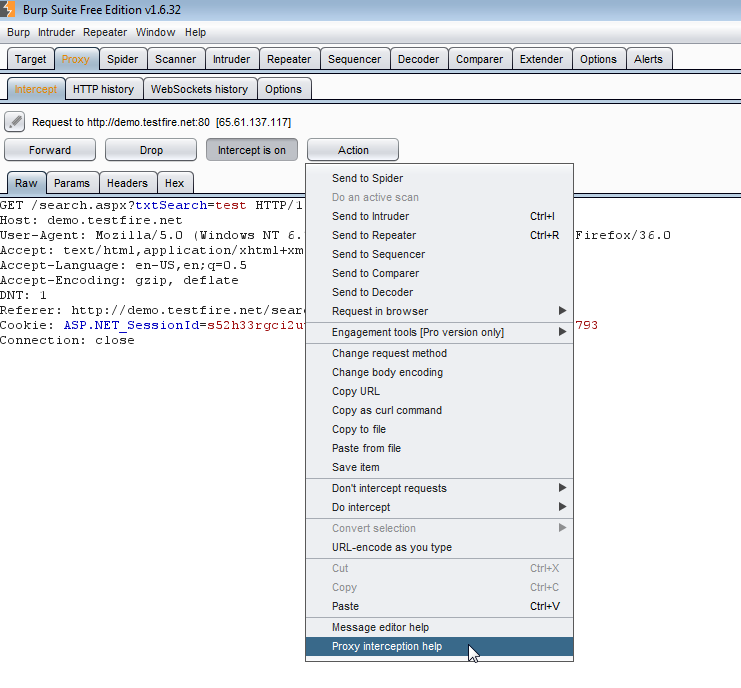
You can modify requests from here and the send the modified requests using the “Forward” button, or you can prevent the request from sending by hitting the “Drop” button. Under “Actions” there are a lot more options, and from here we can send the request to every other feature within Burp Suite for further testing:
If you want to go back and view the requests that were sent, you can go to the Proxy –> HTTP History tab and see a list of all the requests along with details such as the response length, MIME type, and status code. If you modified the request, a separate tab will be available at the bottom to view the edited and unedited versions of the request:
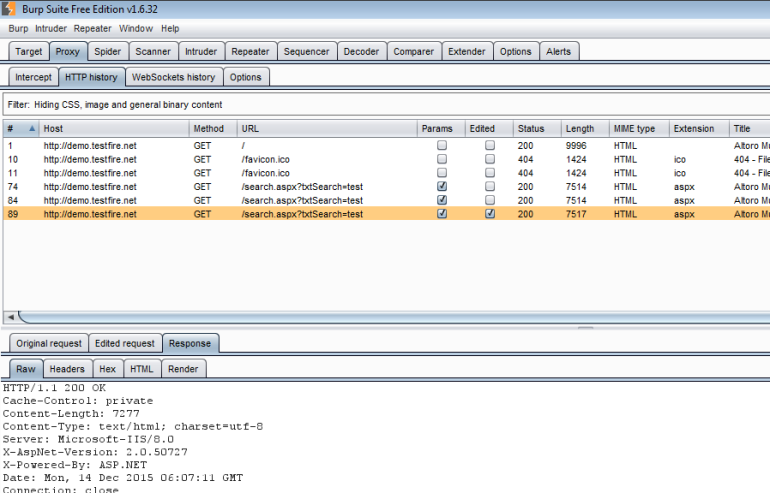
Another useful feature is the automatic request/response modification that can be found under Proxy –> Options. Here you can check off options such as enabling disabled form fields or stripping out JavaScript form validation. You can also use regular expressions to match and replace parts of the request or response:

Spider
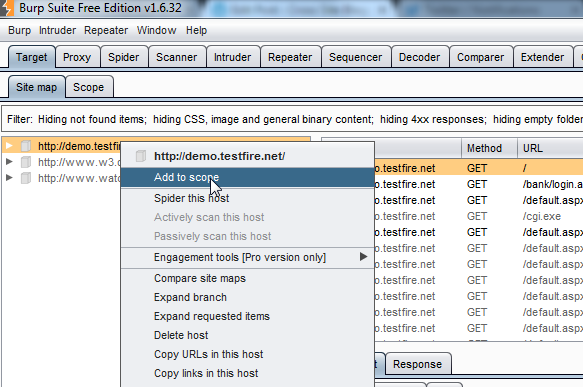
Burp Suite’s spider tool is incredibly helpful when you’re doing your initial recon for a web application. It will passively compile a list of all URLs found in the HTML responses as you navigate through the application, then attempt to reach them. To use it, we can start by adding our target URL to the scope. We can do this in the Target –> Site Map tab by right-clicking on the domain and selecting “Add To Scope”:
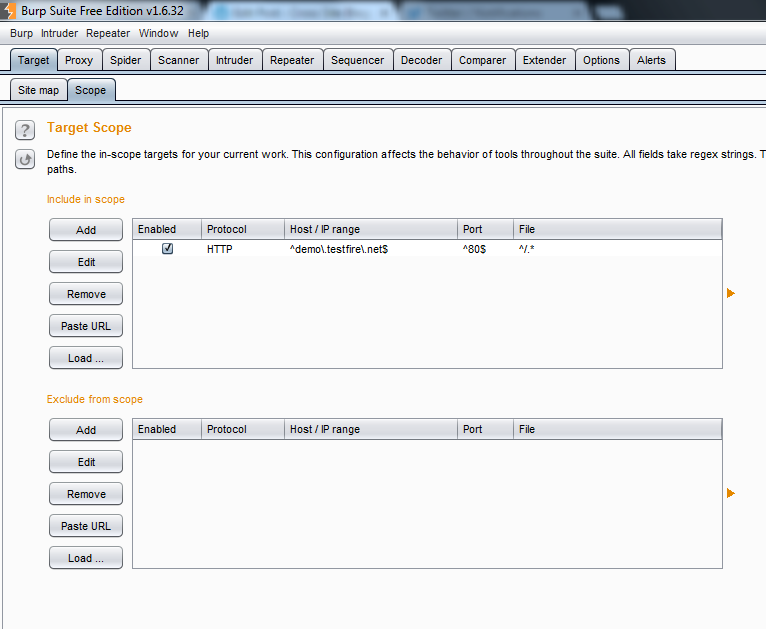
All of the domains you add to Burp Suite’s scope can be found under the Target –> Scope tab. You can manually add domains, modify previous ones, or add URLs that need to be excluded here (for example, if you want to avoid running automated tests against a ‘Contact Us’ form):
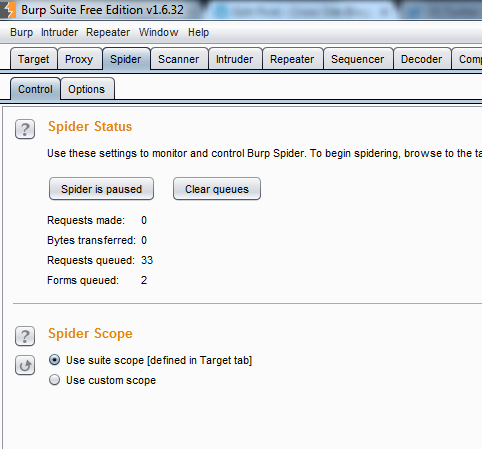
If we go to the Spider –> Control tab now, we can see that there are some URLs that have been queued by the spider. Notice at the bottom that the spider will only run against domains within your scope:
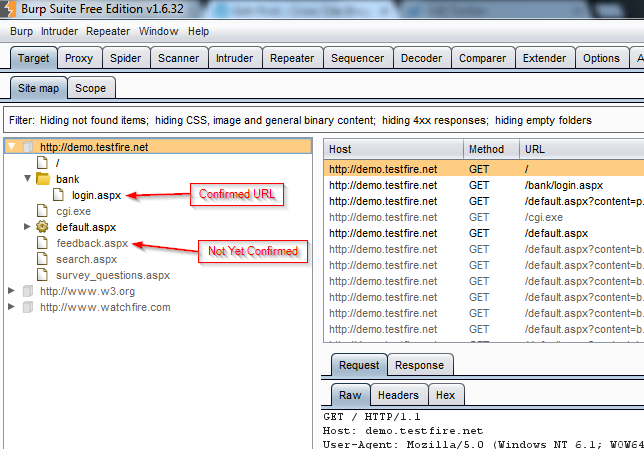
Back in the Site Map, we can see a list of all URLs. A black URL means that we’ve successfully navigated to that page or that the spider has confirmed that it is valid. A gray URL means that the spider has found it in the HTML response, but has not yet confirmed that it is valid:
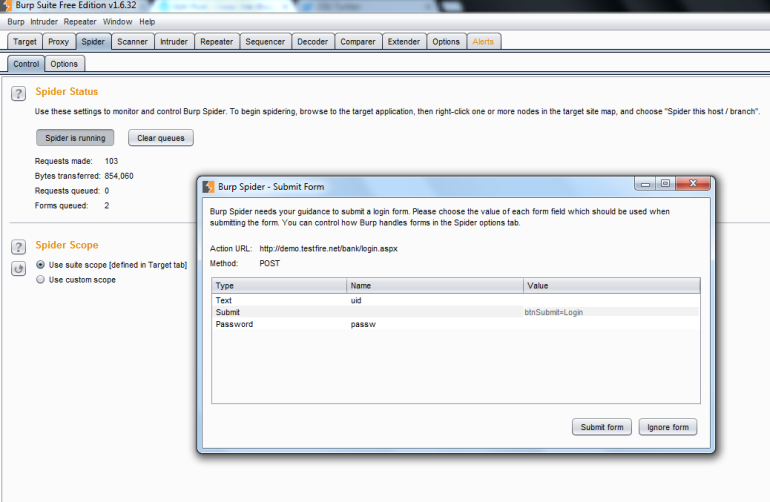
Now that we have the basics setup, we can go back to the Spider –> Control tab and click on the button that says “Spider Is Paused” to run it. The tool will attempt to reach all URLs it’s previously found, as well as any it finds while it’s running. In the event that there is a form that needs to be submitted, a pop up will appear for you to fill in the required information so that it can accurately submit it and ensure that it gets a valid response back:
And now we have a nicely organized list of all URLs that were accessible back in the Site Map:
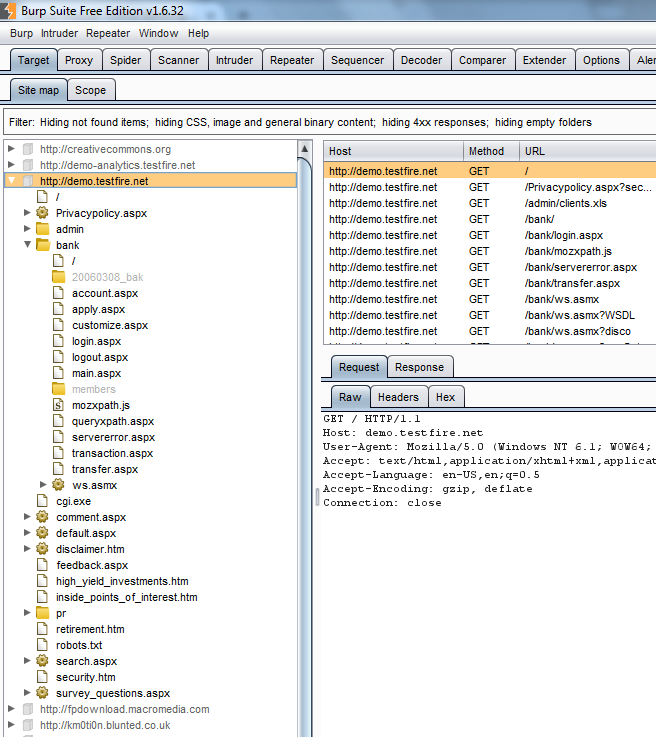
Pretty cool, right? For me, it’s critically important to have a good idea of everything that is available within the application I’m assessing. Not to mention, it’s nice to have some assurance that I didn’t miss anything.
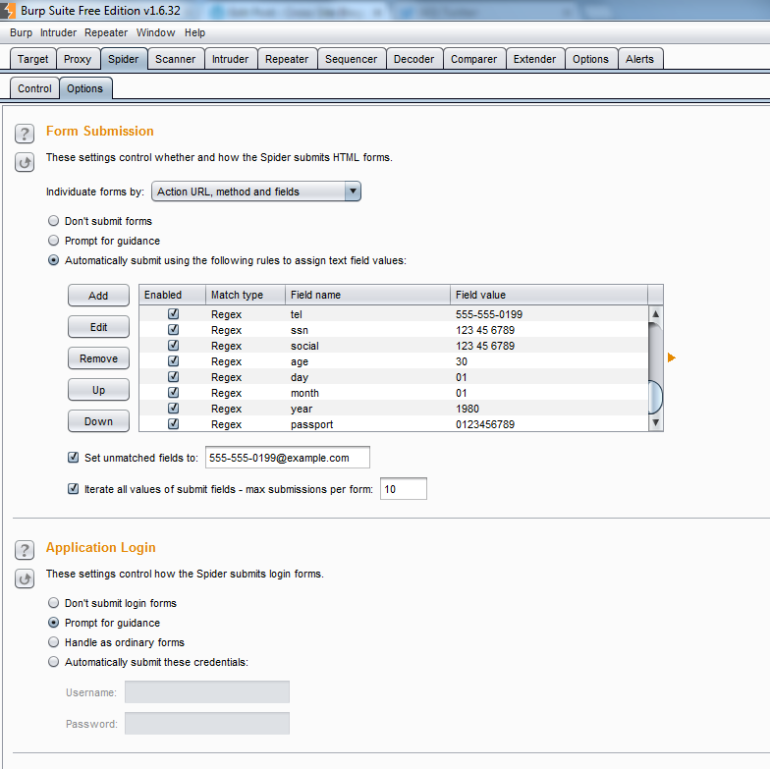
Under the Spider –> Options tab you’ll find some settings that you can fine tune to make sure that spider is running effectively, such as what user-agent header should be sent with the requests and how deep the spider should crawl. Two important settings are the form submission and application login. You can fill these in so that spider will automatically fill out the fields for you, and you won’t have to worry about being prompted:
Intruder
And we’ve arrived at my favorite tool with in Burp Suite. Intruder is a super useful and flexible tool for harvesting data in web applications. We can use it for brute-forcing, enumeration, vulnerability fuzzing, or what ever else your heart desires and then harvest the data from the results. I don’t know if you can sense my love for this tool, but it’s amazing.
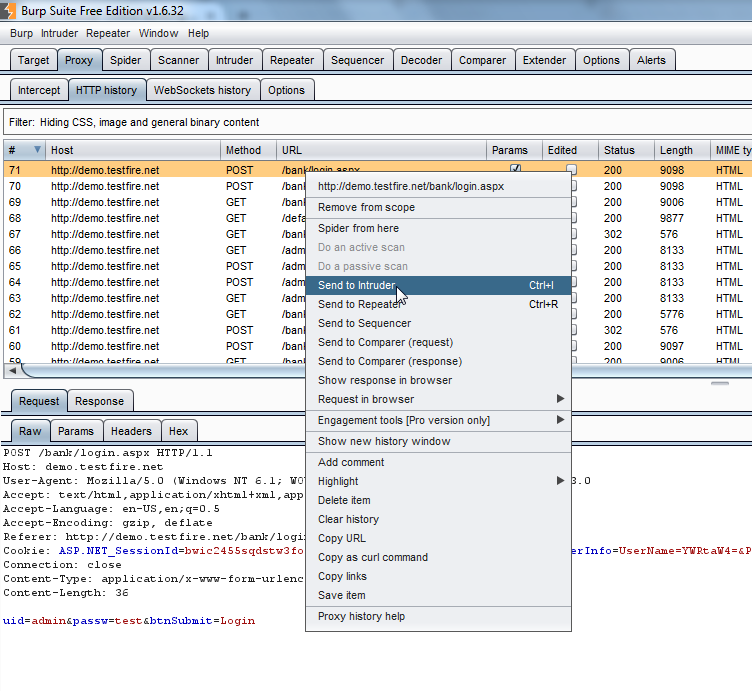
I’ll use a basic example to walk you through the setup. We’ll try brute-forcing the admin password on the login screen considering there’s no account lockout. First, we’ll go to our HTTP history in the proxy, right-click on the request we want to test, and select “Send To Intruder”:
Now we can go to the Intruder tab and prepare our attack. The Target tab will automatically populate with the host and port from the request. Under the Positions tab we can see the request we’ve selected and set the position for our attack. You can do this by highlighting the area with your mouse then selecting “Add” on the right. You can also select multiple positions if needed.:
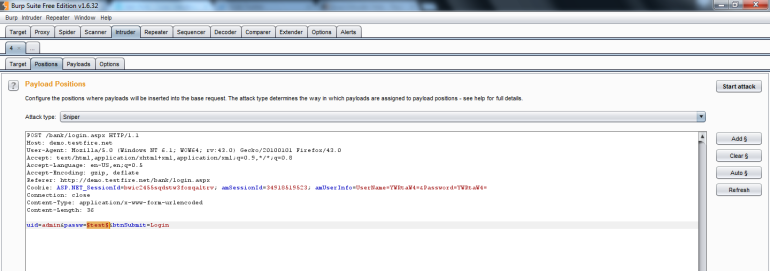
At the top, you’ll see the attack type. For this example we’ll leave it as Sniper, but each attack type has a specific use:
- Sniper – This uses a single set of payloads. It targets each payload position in turn, and places each payload into that position in turn. This attack type is useful for fuzzing a number of request parameters individually for common vulnerabilities. The total number of requests generated in the attack is the product of the number of positions and the number of payloads in the payload set.
- Battering ram – This uses a single set of payloads. It iterates through the payloads, and places the same payload into all of the defined payload positions at once. This attack type is useful where an attack requires the same input to be inserted in multiple places within the request. The total number of requests generated in the attack is the number of payloads in the payload set.
- Pitchfork – This uses multiple payload sets. There is a different payload set for each defined position. The attack iterates through all payload sets simultaneously, and places one payload into each defined position. This attack type is useful where an attack requires different but related input to be inserted in multiple places within the request. The total number of requests generated in the attack is the number of payloads in the smallest payload set.
- Cluster bomb – This uses multiple payload sets. There is a different payload set for each defined position. The attack iterates through each payload set in turn, so that all permutations of payload combinations are tested. This attack type is useful where an attack requires different and unrelated or unknown input to be inserted in multiple places within the request. The total number of requests generated in the attack is the product of the number of payloads in all defined payload sets.
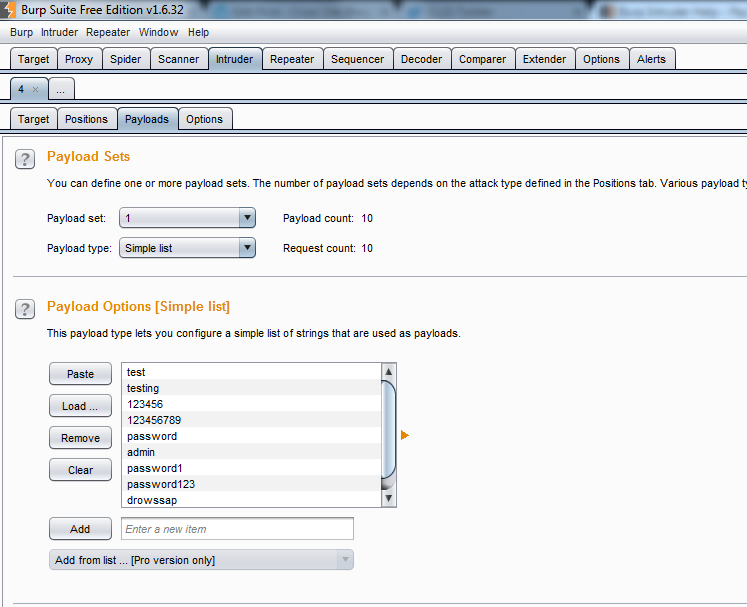
Now that the positions are set, we can move to the Payloads tab and set what data will be used during the attack. At the top, you’ll see the payload sets. Each set correlates with each position you set previously. Each set will also have a payload type associated with it. For our example, we will select “Simple List”.
Below that, we can set the payload options. Each payload type has different options you can modify for your test. One that I use commonly is “Numbers”, which allows you to set the range, whether it’s sequential or random, the step between each attack, etc. But for our brute-force attack, we can just upload a simple list of passwords to try:
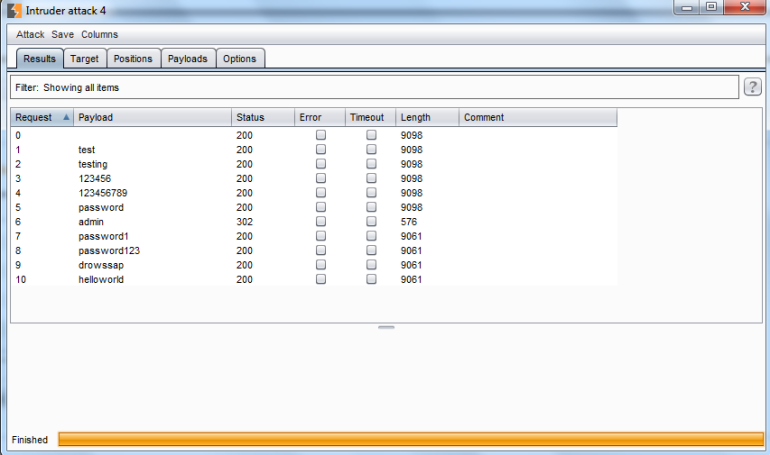
All that’s left to do is start the attack by clicking on the “Start Attack” button in the top right. A new window will pop up with your intruder session, displaying each payload that was attempted and details of the response. Request 6# had the right password for our example:
If we go back to the main window and go to the Intruder –> Options tab, we’ll find some additional settings we can configure to make the most of this tool. A very important one is the “Grep – Match” section which allows you to flag results based on a string or regular expression found in the HTML response. This will show up as an additional column in your intruder session.
Note: The free version on Burp Suite severely throttles intruder. The pro version is significantly faster.
Repeater, decoder, and comparer are also very helpful tools to have. They’re very simple to use, just right-click on your request or highlighted portion of the request and select “Send To”. PortSwigger did an amazing job of making this suite of tools very intuitive, I don’t think I need to cover those.
I hope you enjoyed, stay tuned for more tutorials!

Was introduced to this Software in class. Wanted to know more and stumbled upon this. Great Tutorial !
LikeLike
[…] you’re new to Burp Suite, I would take a moment to skim through our previous post, Burp Suite For Beginners to get a feel for the basic setup and overview of tools within the suite. We’ll be walking […]
LikeLike
[…] * 参考来源:hack-ed,vulture翻译,文章有修改,转载请注明来自FreeBuf黑客与极客(FreeBuf.COM) […]
LikeLike
[…] 参考来源: hack-ed […]
LikeLike